
Every once in a while, I go out on a tuning job only to find that the piano in its current state is impossible to tune. Some tuners throw this sentiment around whenever they encounter a piano that is worth anything less than a few thousand dollars. “Impossible to tune” to these kind of tuners just means that the piano is incapable of sounding like a nine-foot concert grand. That's not what I'm talking about. These pianos of “lesser value” are in many cases much more important than the ones in the concert halls and auditoriums. These pianos are seen and heard every day. They bring warmth to homes and joy to the people in them. So, when I say “impossible to tune”, I mean it literally. The piano is physically incapable of making music. The most common reason for this is because the tuning pins have lost their grip.
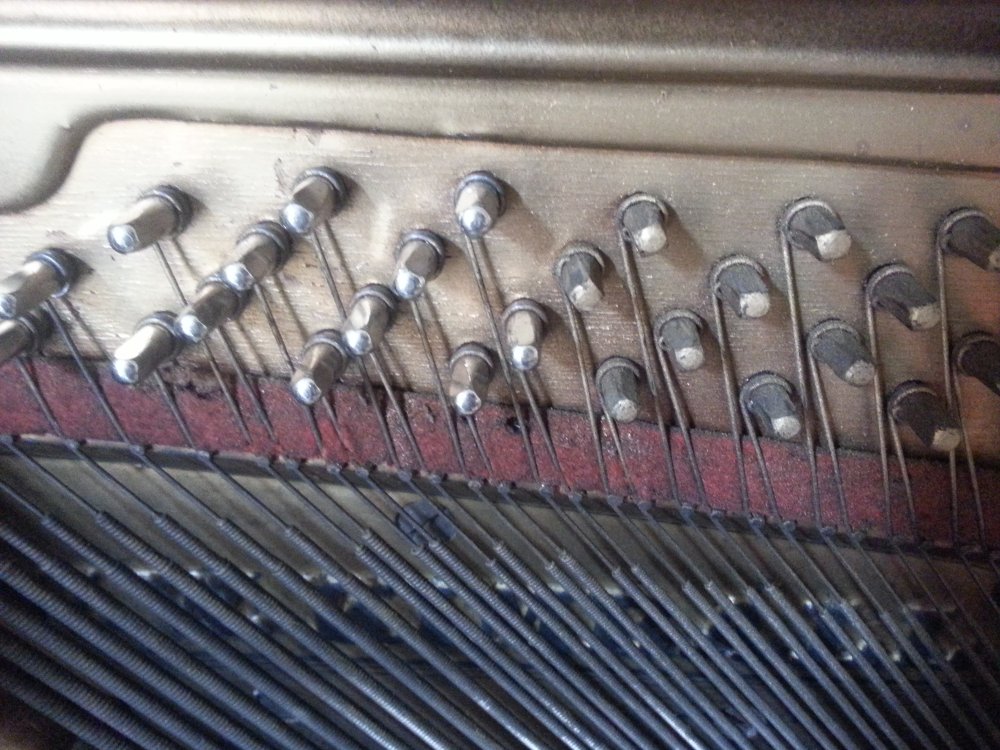
Bass tuning pins in a Kimball upright. The shiny pins on the left are slightly larger replacement pins. The dull pins on the right are the originals that no longer are able to do their job of holding tension on the strings.
In my post “Loose Tuning Pins CA Glue Repair” I described a procedure that is used to tighten-up tuning pins that are slightly loose. Sometimes the pins have gotten so bad that CA glue won't do enough to make the piano functional again. In these cases, it is necessary to replace the tuning pins with slightly larger ones.
The way that a piano holds tension on its strings is by having one end of each string looped around a stationary iron “hitch pin” and the other end wound around a tuning pin. These pins are between 2 and 2-1/2 inches long, however only about an inch of them is visible. This is the part that the string is wound around, as well as the part that a tuning wrench is placed over in order to turn the pin (changing the tension on the string and consequently changing the pitch of the string). The other inch and a half of the pin is tightly embedded in a laminated block of wood called the "pinblock". The pinblock is made of several sheets of wood that are glued together so that the grain of each layer runs in a different direction than the layer next to it. This layering adds a lot of strength and resilience to the wood. This is vital when each of the 200+ pins has about 150 pounds of tension on it.

The tuning pin and coil after loosening 3/4ths of a turn.
Over time, the wood fibers in the pinblock get slightly crushed and start to loose grip on the tuning pins. When this happens, the pin requires significantly less force to turn, and in bad cases the tension of a string at the proper pitch is enough to turn the pin all on its own. This is what I am talking about when I say “impossible to tune”. The string can be pulled up to pitch, but as soon as the tuning wrench is released, the tuning pin slips in the pinblock and the string goes out of tune. In these cases, the best solution is to remove the tuning pins and replace them new, slightly larger pins.
If you plan in replace a large number of tuning pins, you want to be sure that the larger pins are actually going to help your problem. If the pinblock of your piano is severely cracked or has delaminated, it needs to be replaced before any other work is done. If you are unsure as to the condition of the pinblock, it may be worth it to just replace a pin or two here and there across the length of the piano, pull the strings up to pitch, and wait for a few weeks while occasionally giving a firm strike on each of the corresponding keys. If the strings with the replaced pins haven't drifted far out of pitch at the end of this test period, you can go ahead and replace the rest of the pins.
Before you start, you will need a tuning wrench, new tuning pins, a tuning pin setter or punch, a hammer, a thin flathead screwdriver, and a few different sets of pliers.
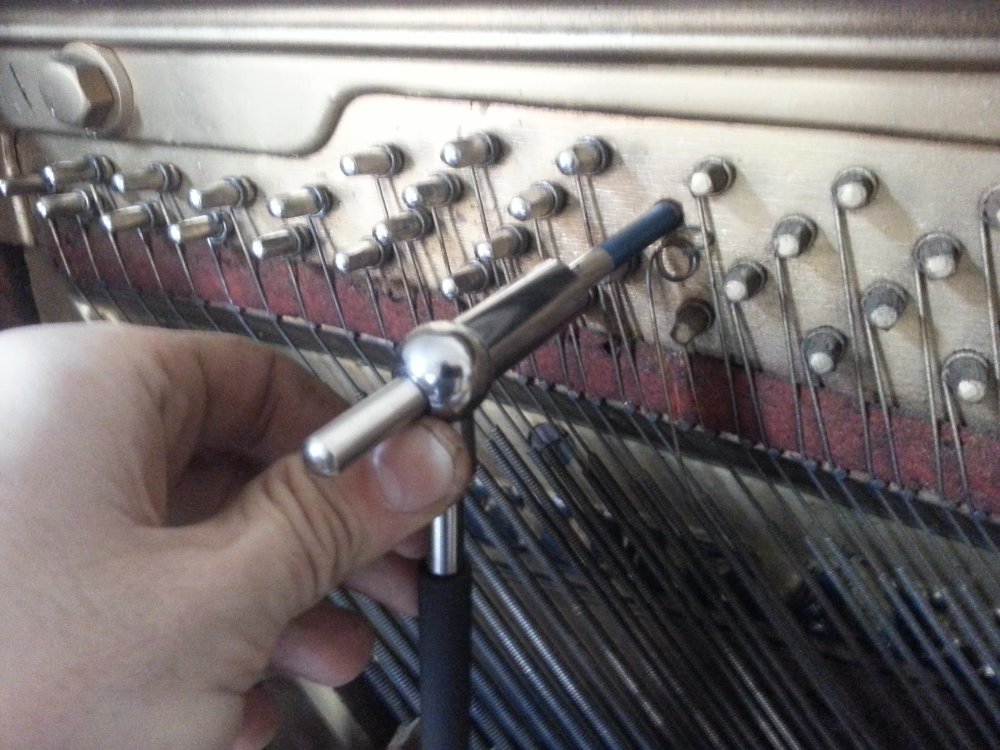
Tuning pins come in sizes ranging from .276” to .306” in diameter and in .005” increments. To determine the size you need, remove one of the loose tuning pins by turning it counter-clockwise until the string is loose enough to remove from the pin (about 3/4ths of a turn). The string has a tight bend at the end (called a becket) that is inserted into a hole in the center of the pin. Pry the becket from the hole with a flathead screwdriver.

Prying out the becket.

Releasing some tension by pulling the string off of the termination pin.
In the bass of many upright pianos, you can release a bit more tension by pulling the string over the termination pin just below the tuning pins. The coil can now be pulled all the way off the tuning pin. Using a tuning wrench or a string crank, turn the pin counterclockwise until it comes free from the pinblock. Using a micrometer, measure the diameter of the pin. Find your size here: http://www.vandaking.com/s-210-piano-tuning-pins.html. If your old tuning pins loosened instantly under proper string tension, order new tuning pins that are two sizes larger. If the old pins loosened slowly over time under proper string tension, order one size larger. Make sure you get new pins that are the same length as the originals.

The coil fully removed from the tuning pin.
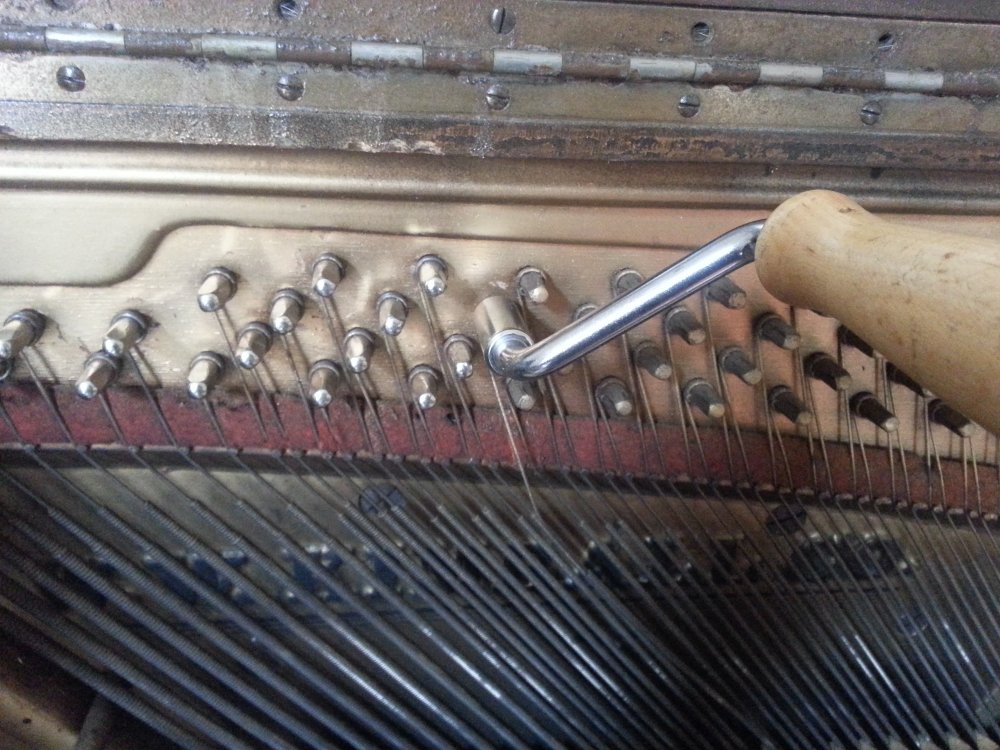
Spinning the pin out with a stringing crank.

The tuning pin has been removed.
At this point, there is a bit of disagreement between piano technicians as to the proper technique. Some technicians will drill or ream out the tuning pin hole to a size just slightly smaller than the diameter of the new pin. Others will clean out the hole with compressed air, a vacuum, or a long slender brush. Some technicians don't prep the tuning pin hole at all. In this case, the pins were already so loose that the holes did not need to be re-sized, and so I went right ahead and hammered the new pins in.
The tuning pin setter and the new tuning pin ready to be hammered into the pinblock.
In order to install the new pins, use a tuning pin setter and a hammer to tap the new pins straight into the pinblock. Only tap the pin in until it sticks out just slightly further than the original pins around it. The goal is for the bottom of the string coil to end up 3/16ths of an inch away from the plate (or the pinblock if the plate doesn't cover the full height of the piano). Pull the coil onto the new tuning pin and insert the becket into the tuning pin hole. If you pulled the string off of the termination pin earlier, place it back along its original path. Make sure that the string is still following its path through the bridge pins down below the keyboard. From this point, you will follow the same directions in my “Replacing a Broken String” tutorial.

The new pin after hammering.

Placing the coil on the new pin.
To see more photos of this procedure, take a look at Chuck Behm's instructions in this helpful PDF.

Checking to make sure the strings are all still following the correct path over the bridge.

The pin after bringing up to pitch.
Recent Blog Posts


I have been servicing and tuning pianos in NOLA since 2012 after first becoming interested in piano technology in 2009. With a background in teaching bicycle mechanics, I bring a methodical mindset and a love of sharing knowledge and skills to the rich musical culture of New Orleans.