
A neighbor was getting rid of this wonderful little Kohler Campbell console piano a few weeks ago. Overall, it was in really good shape and just too good of a deal to pass up. We picked it up, brought it home, and I proceeded to tinker with it for a little while to find any problems.
The only information that the former owner was able to give me was that there were some "sticky keys". This means that a key will produce a sound the first time it is struck, but will not sound with any following strikes. This is probably the single most common issue that people come across in their pianos, not only because people lump several different symptoms under the label "sticky key", but also because there are probably over a dozen different issues that can cause a sticky key.
It turned out that the only major problem with this piano was that nearly all of the hammer return springs had corroded and broken. These springs only exist in upright pianos (their role is fulfilled by gravity in grand pianos). Their function is to assist the hammer in falling back to its rest position after striking the string. If they are broken or disengaged, the hammers will not consistently return after striking. This will cause missed strikes during which a key will be pressed, but no sound will be produced.
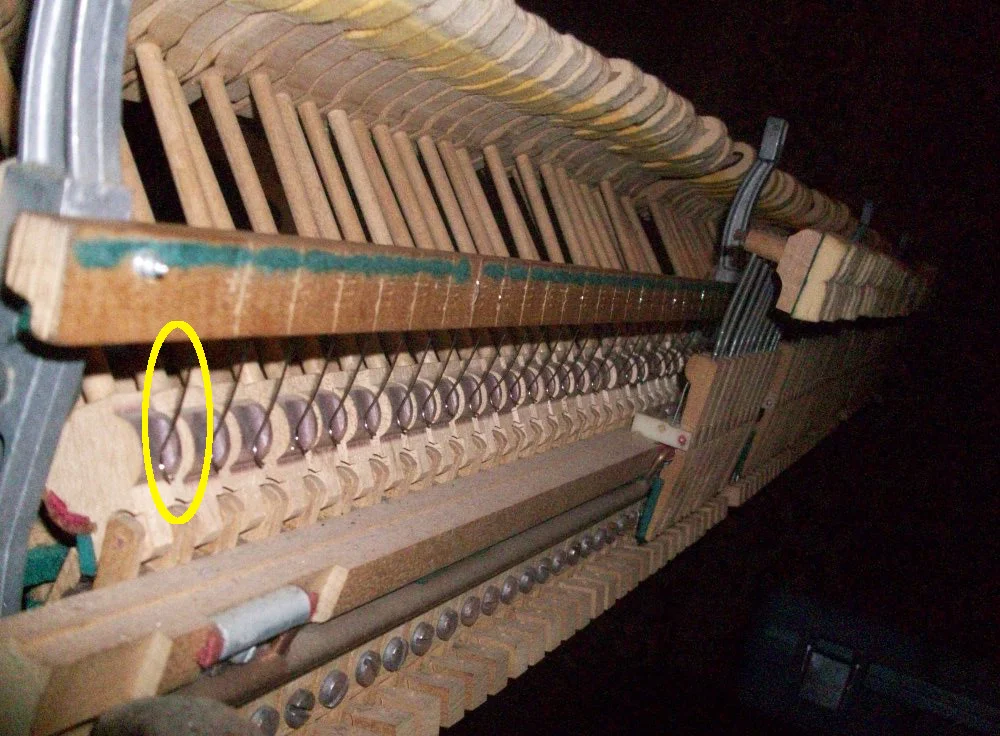
Hammer return spring circled
Above is the piano action as it should look, with all hammer return springs intact. This photo was taken after I had finished repairing the springs. Below to the right, you can see how the spring rail looked originally with all of the broken springs still on it. Below to the left, you can see the piano action with the spring rail and hammer rest rail removed.

Piano action with hammer return spring rail and hammer rest rail removed

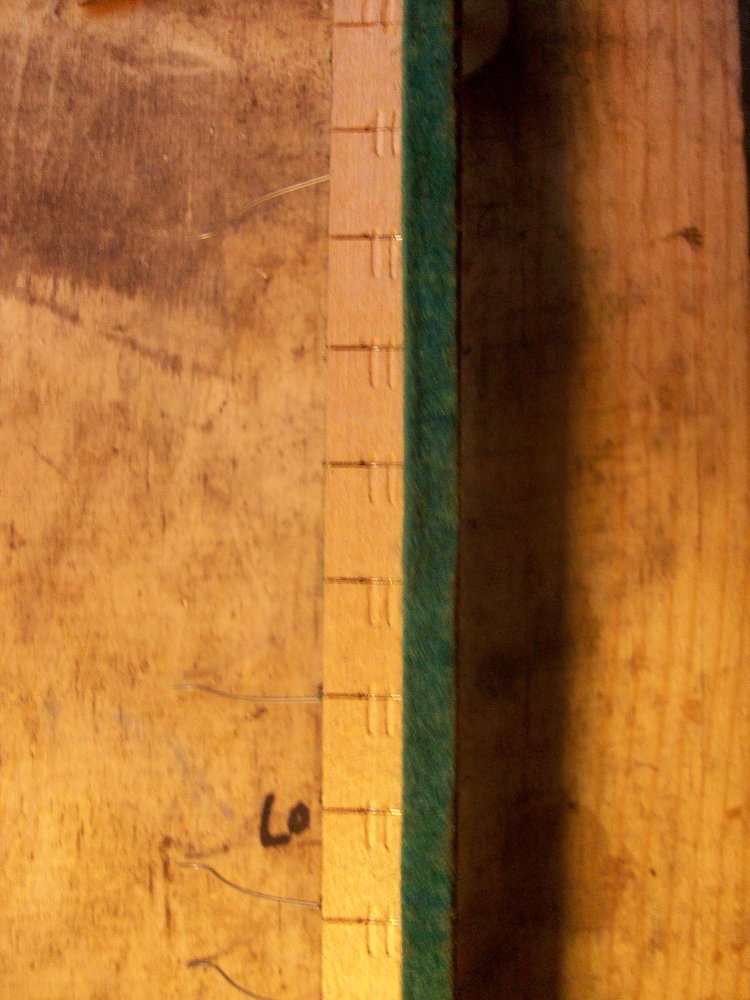
Hammer spring rail
For this repair, I needed to remove the spring rail from the rest of the piano action, but in order to access the screws that hold it on, I first needed to remove the hammer rest rail. This rail is held in place by four steel pins with 90 degree bends in them. Three of the bends point one direction and one points the other direction. Once the oddball pin is removed from the action, the remaining three pins will all slide out in the same direction and the hammer rest rail can be removed.
Apparently in some pianos the oddball pin is spring-loaded or has some other method of easy removal. This piano, however, has no such device, and so the action bracket that the pin is inserted into must be pulled away from the pin. There are two screws on the lower end of the action bracket that, if removed, allow the bracket to be pivoted enough for the hammer rest rail pin to be removed.

Hammer rest rail showing the four pins that hold it in place

Opposite facing pins
After removing the hammer rest rail, the four screws that hold the spring rail in place can be removed, and the rail can be slid sideways out of the action.
First, I need to remove all of the old springs from the rail. There is a hole through the rail that the tail of each spring is fed through. The tail is then bent sharply downward by a machine (which leaves the two parallel indentations) into a slot which holds the end of the spring tightly. I don't own one of these machines, so when I install new springs, I will be making a modification to this rail so that I can install them tight enough.
First, I remove the strip of felt that is covering the ends of the spring tails. The glue holding the felt down can be loosened by applying some diluted wallpaper remover to the felt and allowing it to sit for a half hour or so. After removing the felt, pry the tails of the springs out of their slots by using a sewing needle and a small screwdriver. Then, grasp the coil of a spring with a small needlenose pliers and use the pliers as a lever to pull the spring out of the rail.


An intact spring, one with a broken end, and one with a broken tail

Hammer spring carnage

New spinet springs
There are several different lengths of these springs, so make sure you buy the correct length for your piano. My piano is a console, so I bought the "spinet" length springs. The measurement you need is from the coil to the end of the curvy part.
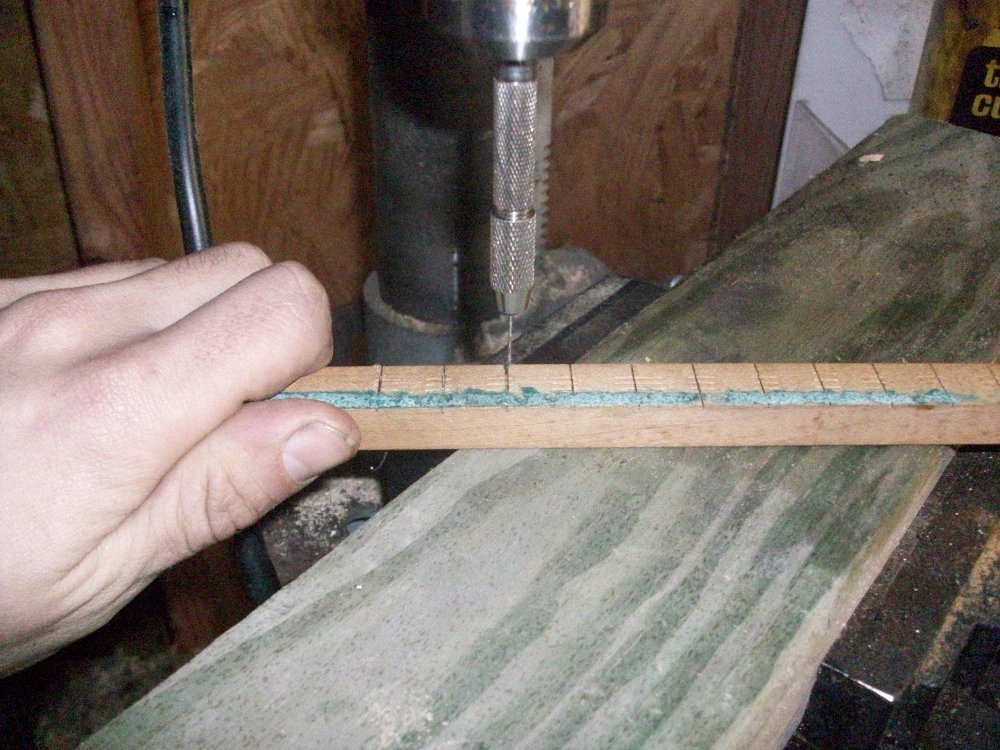
The modification that I mentioned earlier involves drilling an extra hole for each spring through the spring rail. Some piano manufacturers make spring rails that already have two holes per spring like this. The advantage is that the second hole will allow me to pull the tails really tightly into the wood with a pair of pliers, and eliminates the need for the specialized "parallel indents" machine.
To make the holes, I clamped a drill bit just slightly thicker than my spring tails into a pin vise. I then inserted the pin vise into my drill press. The reason for the pin vise is that the chuck on my drill press can't clamp onto something as small as this drill bit. The slots in the rail give me a nice little guide for the drill bit. I'm aiming to go through the rail right at the top of where the strip of felt was glued down.
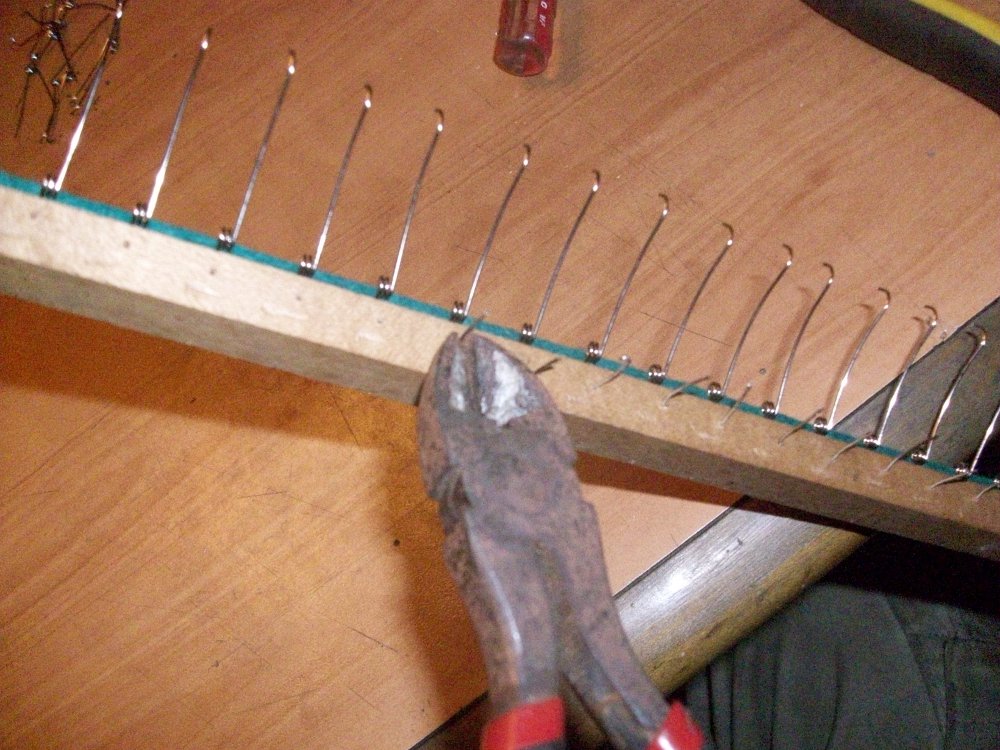
After I've drilled all 88 holes, I can start installing my new springs. I insert the tail through the rail, and use a wire-bending pliers to create a 180 degree bend in the tail. The tail can then be pushed through the hole I just made until it pokes out of the same side of the rail as the body of the spring. I then grab the tail with a set of linesman pliers and, using a lever motion, pull any slack out of the spring until the coil is nice and snug up against its felt.


The springs will tend to need a bit of manual aligning and straightening after they are all installed. After they are all aligned, go through and snip the tails as close to the rail as possible.


The finished installation
When all of the springs are on the rail, remember to glue your strip of felt back onto the rail (which I forgot in the picture above), and carefully slide the rail back into the action without catching the springs on any other action parts. Reinstall the screws that hold it in and reinstall the hammer rest rail.
The springs will probably need to be bent toward or away from the hammers a bit to make the action feel normal again. I try to make them so that they are just barely putting any pressure on the hammers when at rest. If they are applying too much pressure, the hammers will return very quickly, but the action will feel very heavy and cumbersome. Too little pressure and hammer return will be inconsistent and the springs may "click" against the hammers when the note is played.
Recent Blog Posts


I have been servicing and tuning pianos in NOLA since 2012 after first becoming interested in piano technology in 2009. With a background in teaching bicycle mechanics, I bring a methodical mindset and a love of sharing knowledge and skills to the rich musical culture of New Orleans.