
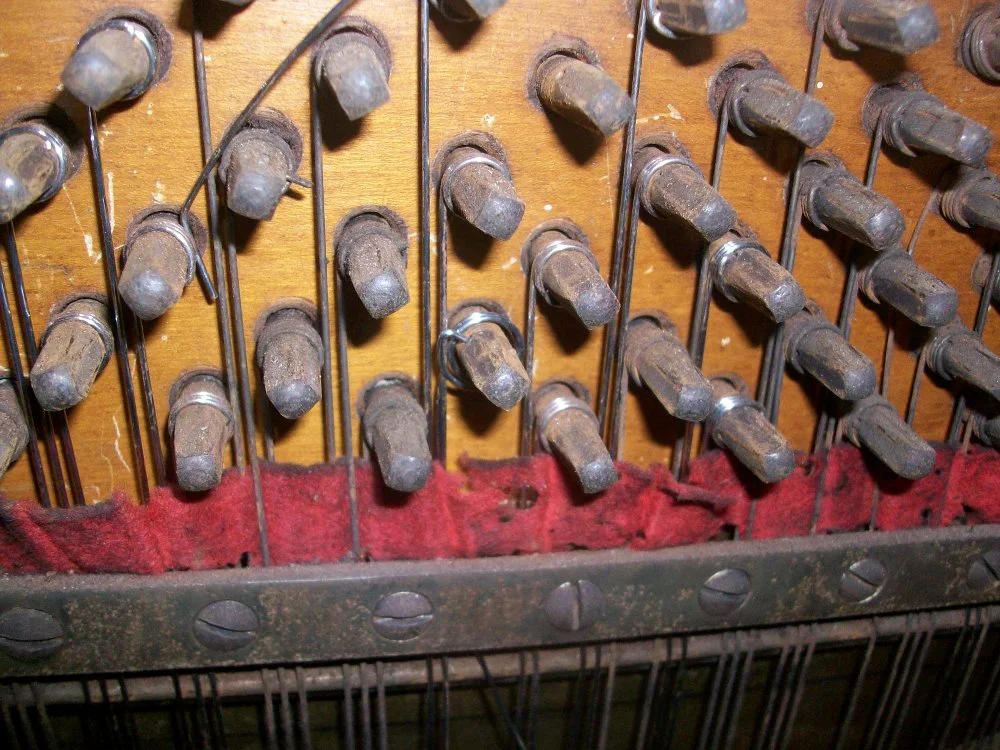
Broken strings can be a common occurrence on certain pianos, especially if it is an older instrument, has been exposed to high humidity, or is played with a heavy hand. Most of the time, the strings that break will be the thinner ones in the highest section of the piano. Unlike other string instruments in which each string only has one speaking segment, these strings actually have two. The string starts at a tuning pin at the top of the piano, runs down through several guides, does a 180 degree bend around a hitch pin at the bottom, and then runs back up through more guides and into another tuning pin. Except in the bass section, each note of the piano is produced by three different speaking lengths of strings. I have already replaced several strings in this piano (the new ones are much shinier), but still have a few to replace.
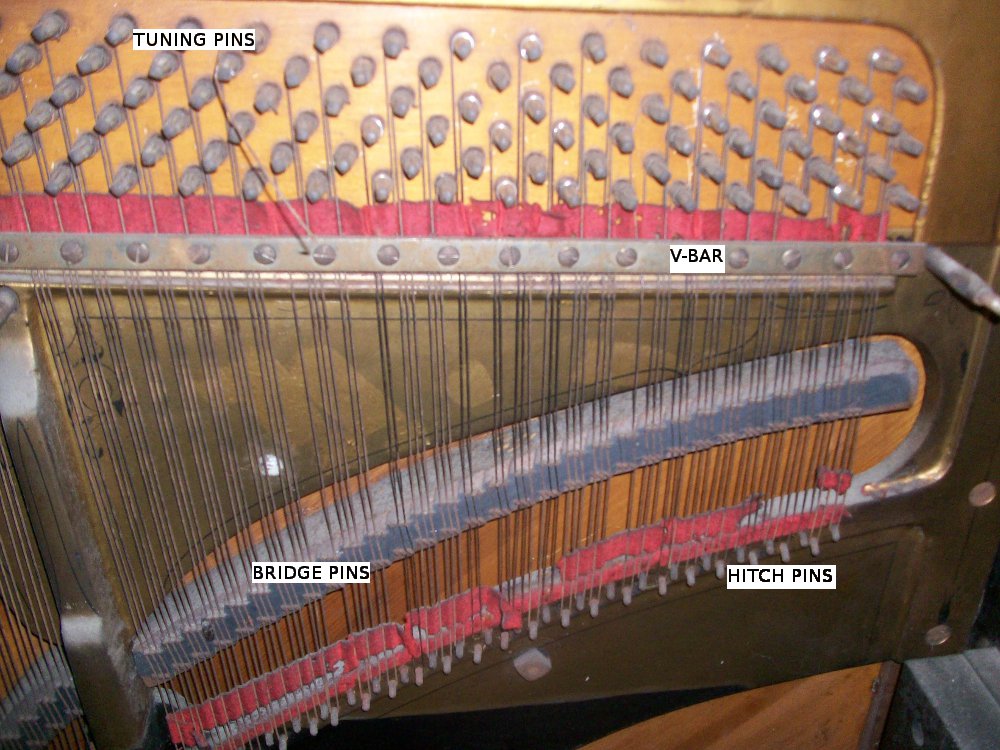
The first step is to cut the broken string just below the v-bar in order to make removal easier. The string must be measured with a micrometer or caliper to ensure that it is replaced with a string of the same thickness. Treble piano strings range from size 12 (.029" diameter) to size 22 (.049" diameter) and come in 1/2 size increments. This means that there is only a .001" difference between any two sizes. Piano wire sizes can be confusing if you are familiar with wire gauge sizes which get larger in diameter when the size number gets smaller. Often times, the string to be replaced will measure as in between two sizes (e.g. .0335"). In this case, choose the larger size as the string will tend to get slightly thinner as it is stretched while tuning.
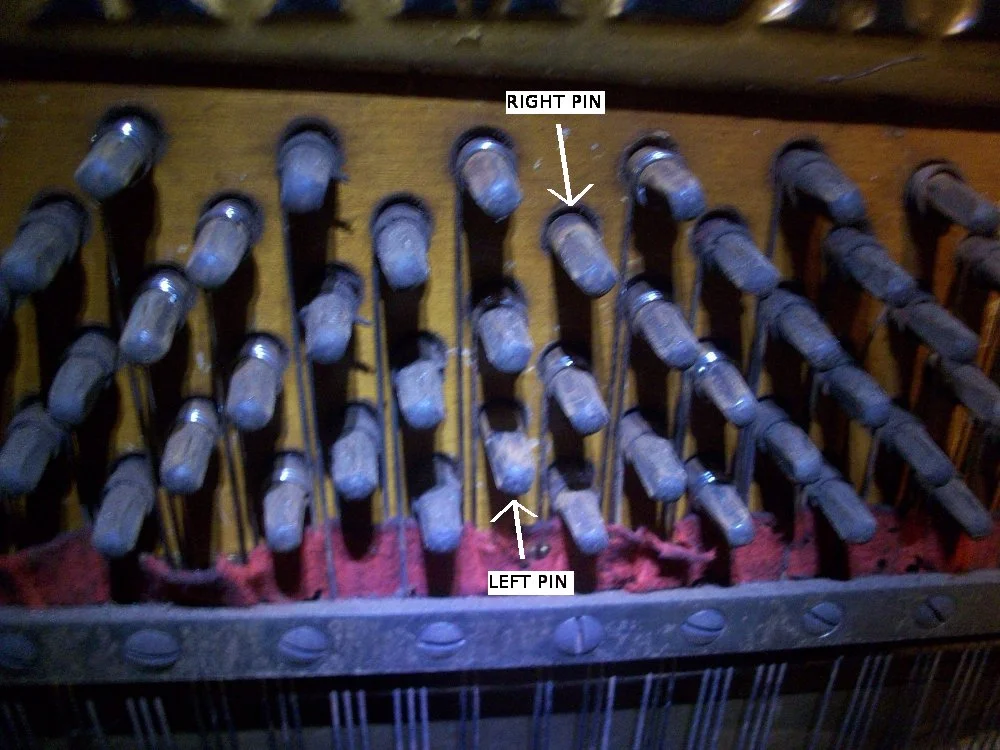
The left tuning pin can then be loosened (turned counterclockwise) one half a turn, and the remaining coil can be pried off with a needle-nose pliers and screwdriver. The same can be done with the right tuning pin except with a full turn counterclockwise. The picture above shows the two tuning pins after the old coils have been removed.

Piano wire can be purchased in short lengths for the replacement of a single string or in various sorts of coils like the one shown above. Long lengths of wire are very springy and can quickly get out of hand if not held tightly in such a coil.
Replacement string

Dummy pin and stringing crank
The oils that are produced by most peoples' skin can cause piano wire to rust, so I wear these thin cotton gloves whenever I need to replace strings. I've cut a piece of wire that is long enough to span the distance from the tuning pin to the hitch pin and back plus about 6-8 inches. This is to allow enough room to make the coils on each end, plus a little extra breathing room.
Start by feeding one end of the wire under the v-bar toward the left tuning pin. The next step is to make the first coil. To do this, I use a dummy pin (a normal tuning pin removed from a scrap piano) and a stringing crank. Take the end of the wire that has passed under the v-bar and insert it through the hole in the tuning pin so that the end is flush with the surface of the pin. Make a tight counterclockwise bend (called a "becket") in the wire and use the stringing crank to make two and a half tight coils on the pin.
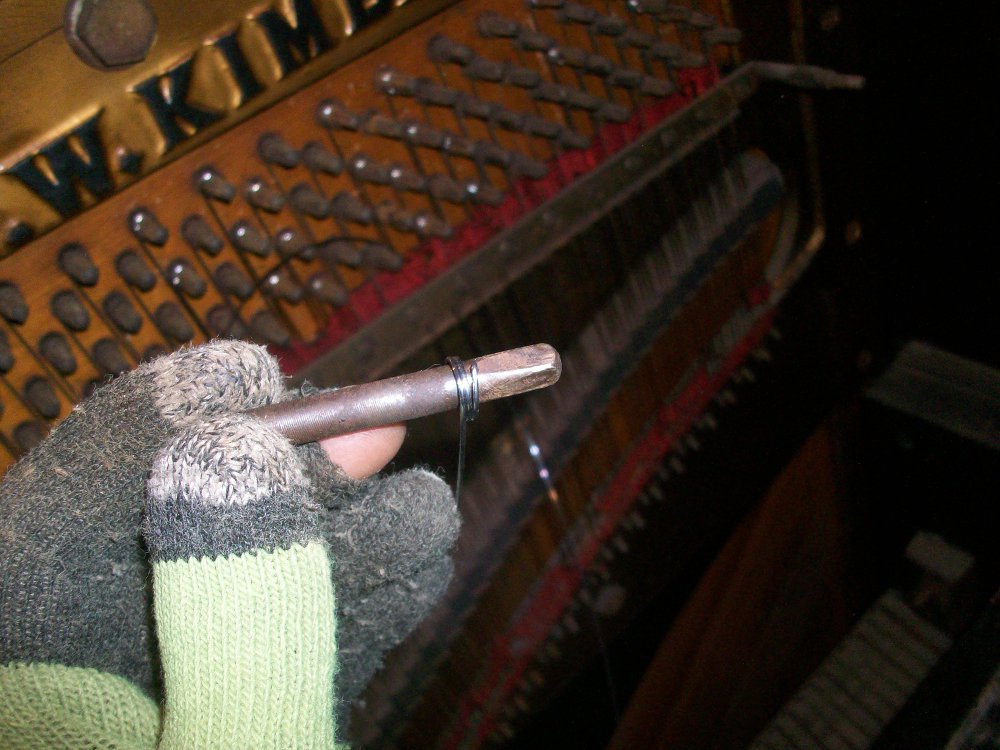
Making coils on the dummy pin
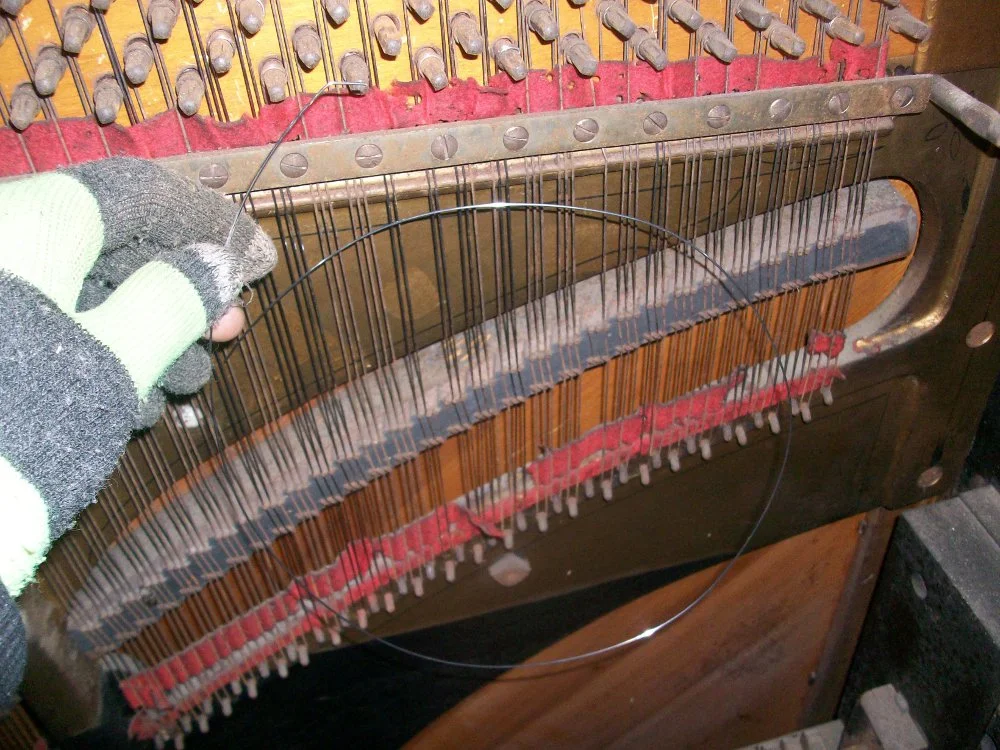
Pry the becket out of the dummy pin, push the coil onto the left pin, and insert the becket into the tuning pin hole. Pull the other end of the wire down and make a bend around the hitch pin of a bit more than 180 degrees. The wire will spring back a bit and the bend should stick at about 180 degrees. Feed the end of the wire up, under the v-bar again, and past the right tuning pin.
One end of the string has been coiled onto the left pin. The right pin still needs a coil.
Bend the string around the hitch pin.
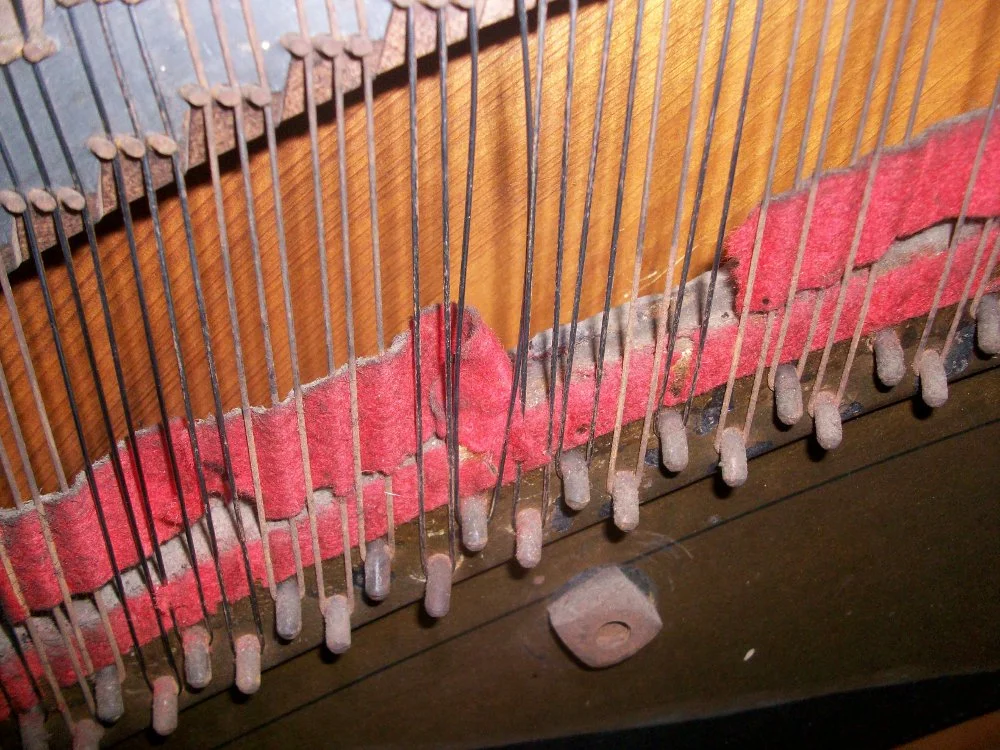
Measure four fingers' length past the right tuning pin and cut the wire. Thread the end of the wire into the dummy pin until flush and make a coil until it is at the same height as the right tuning pin. Remove the coil from the dummy pin, push it onto the tuning pin, and insert the becket into the hole. At this point, make sure the string follows the same path that the strings around it have already established. There are several staggered pins above the hitch pin (called "bridge pins") that the string needs to bend around in a specific way.

Measuring four fingers length above the tuning pin
Now the pins need to be turned clockwise while keeping the coils tight together on the pin. Tighten the right pin first, alternating between making small turns with a tuning wrench and squeezing the becket into the hole with large pliers. You will also need to pull the coil toward you with a screwdriver or coil lifting tool while tightening the pin, in order to keep gaps from forming between the wraps of the coil. Keep alternating until the pin has almost three full wraps on it, then switch to the left pin where the same process can be repeated. Using a screwdriver, adjust the spacing of the strings just below the v-bar to match the spacing of the strings around it. When both sides of the string are taut, the string replacement is finished and the string can be tuned. New strings need to be tuned several times before they are "stretched" and will hold a tune for any length of time.
Recent Blog Posts


I have been servicing and tuning pianos in NOLA since 2012 after first becoming interested in piano technology in 2009. With a background in teaching bicycle mechanics, I bring a methodical mindset and a love of sharing knowledge and skills to the rich musical culture of New Orleans.