
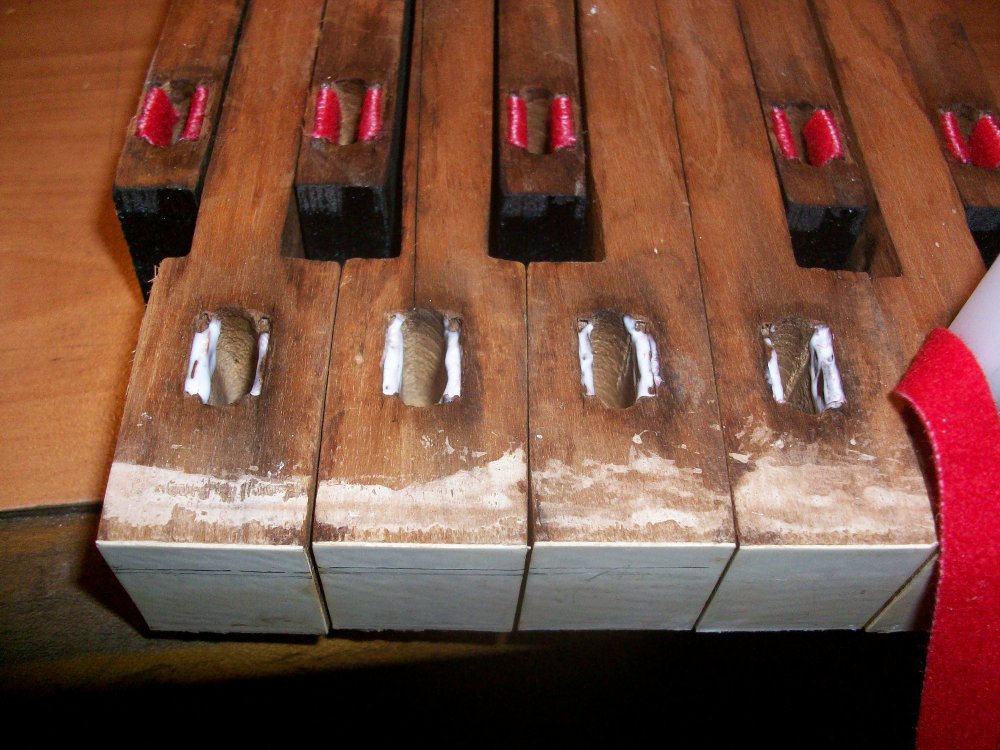
The key bushings of my Milton Player Piano had pretty much all fallen out, resulting in noisy keys that wobbled from side to side. In order to recreate a smooth motion of the keys without sideways play, the balance rail bushings as well as the front rail bushings need to be replaced. Each key interacts with two pins: the balance rail pin and the front rail pin. The balance rail pin is in the center of the key, and allows the key to pivot forward and back. The front rail pin is under the front of the key and guides the key to move in a vertical motion. Both of these pins glide along felt bushings that are glued to the key.
To remove any bushings that haven't already fallen out, place a damp rag over the bushings and steam them with a hot clothes iron (see my post on keytop replacement for pictures of this). Immediately after steaming, the key mortises need to be sized by allowing them to dry with an appropriate key mortise caul inserted. I buy these cauls from Spurlock Specialty Tools. There are several different sizes of caul that each corresponds to a specific size of pin that the keys pivot on. Be sure to measure the front and balance rail pins with a micrometer in order to know which cauls to buy.

Front rail mortises with mortise sizing cauls in place
After the keys have fully dried, pull out the mortise sizing cauls. All of the mortises should now be a uniform size and ready for bushings. Before installing new bushings, I also ordered the .146" bushing cauls from Spurlock Tools (which match my .146" front and balance rail pins), as well as a few different thicknesses of Key Bushing Cloth from Schaff Piano Supply Company.

.146" Key Bushing Caul
Before gluing anything in, push a bit of each thickness of bushing cloth into a mortise to see which one is the right fit. The caul and cloth should push snugly into the mortise, but should not take any significant amount of force. This step is crucial because too thick of a cloth will cause the keys to bind on their pins and too thin of a cloth will cause the keys to wobble side to side.
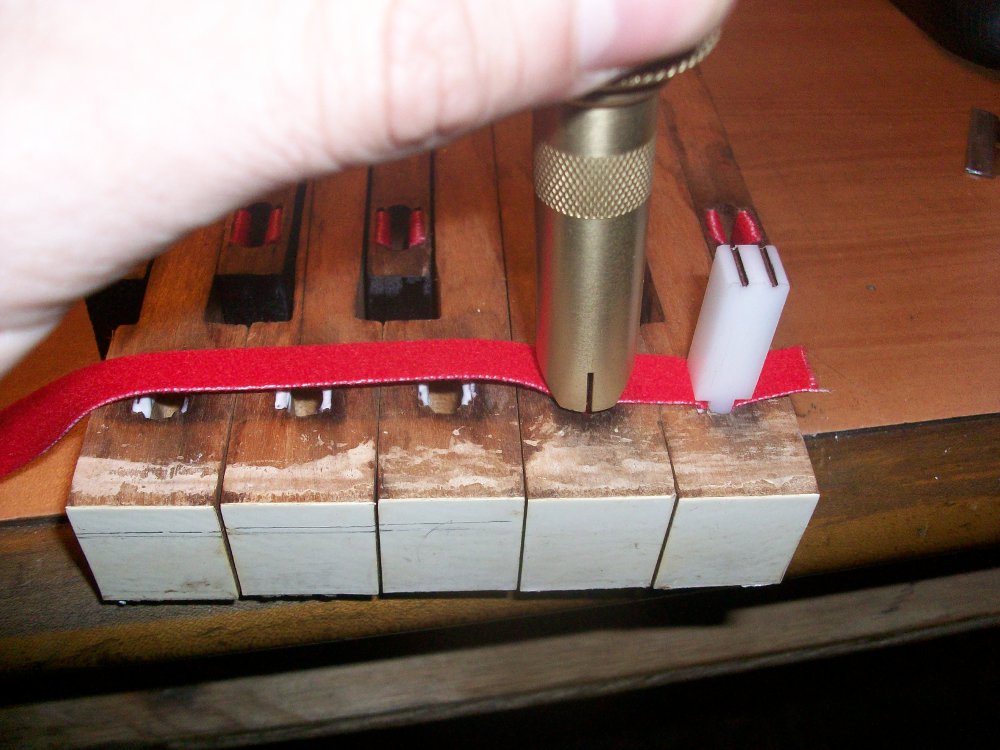
After I've picked the correct thickness of bushing cloth, I apply a bit of glue to both sides of the key mortise with a small brush. I use PVC-E glue, but a PVA glue like Titebond will work, or if you want to get really serious, use hot hide glue.
PVC-E glue applied to the sides of the mortises
If using PVC-E or PVA glue, work in sections of 5-10 keys at a time. If using hot hide glue, only work on 1 or 2 keys at a time. This is due to the fast set time of hot hide glue vs the others.
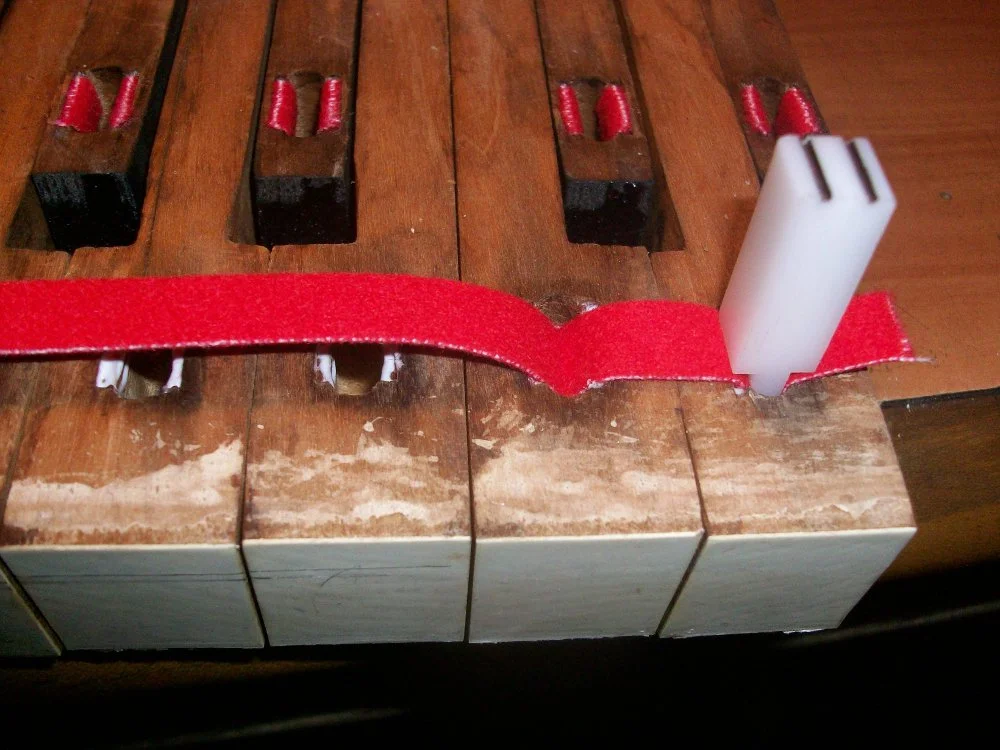
Once I have applied the glue to a section of keys, I lay the bushing cloth across the mortises, push the cloth into the mortise, and cut it in the center using my Bushmaster tool from Pianotek Supply Co. This tool does a wonderful job setting the depth of the bushing cloth in the mortise as well as making a clean cut of the cloth.

The Bush master from Pianotek Supply. The blade on the end is normally recessed into the handle. Pushing on the black plunger causes the blade to emerge.
The tool is first pushed into the mortise with the blade recessed to set the depth of the bushing cloth. The plunger can then be pressed to cut the cloth.
After the tool has been removed, push in a bushing caul to clamp the cloth against the sides of the mortise while the glue dries. After you've finished this section of keys, set it aside while the glue dries, and begin on the next section.
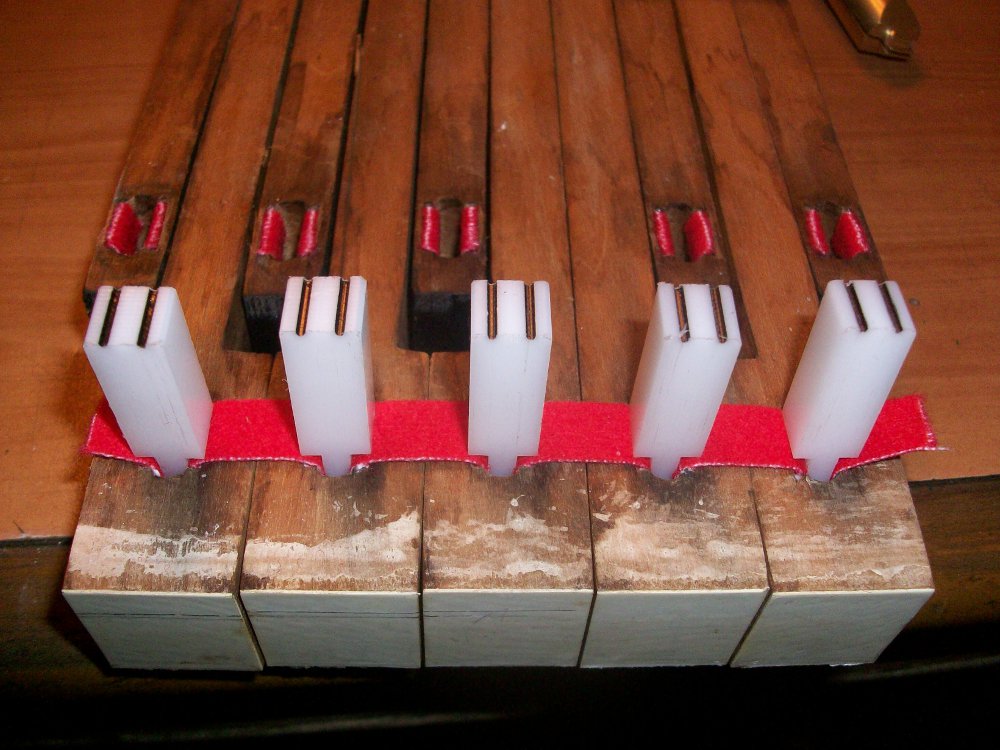
All bushing cauls in place
Once the glue has dried, the final step is to trim the bushing cloth flush with the key by using a razor blade. Once all of the bushings have been trimmed, the keys are ready to be reinstalled in the piano. If any of the keys bind on their pins, a gentle easing of the bushings my be necessary. This is accomplished by gently squeezing the bushings with a pair of wide mouth pliers. Here is a great video on easing key bushings https://www.youtube.com/watch?v=tKCy8s4H9GI

Recent Blog Posts


I have been servicing and tuning pianos in NOLA since 2012 after first becoming interested in piano technology in 2009. With a background in teaching bicycle mechanics, I bring a methodical mindset and a love of sharing knowledge and skills to the rich musical culture of New Orleans.