

The upper stack of a player piano after replacing the lead tubing with new rubber tubing.
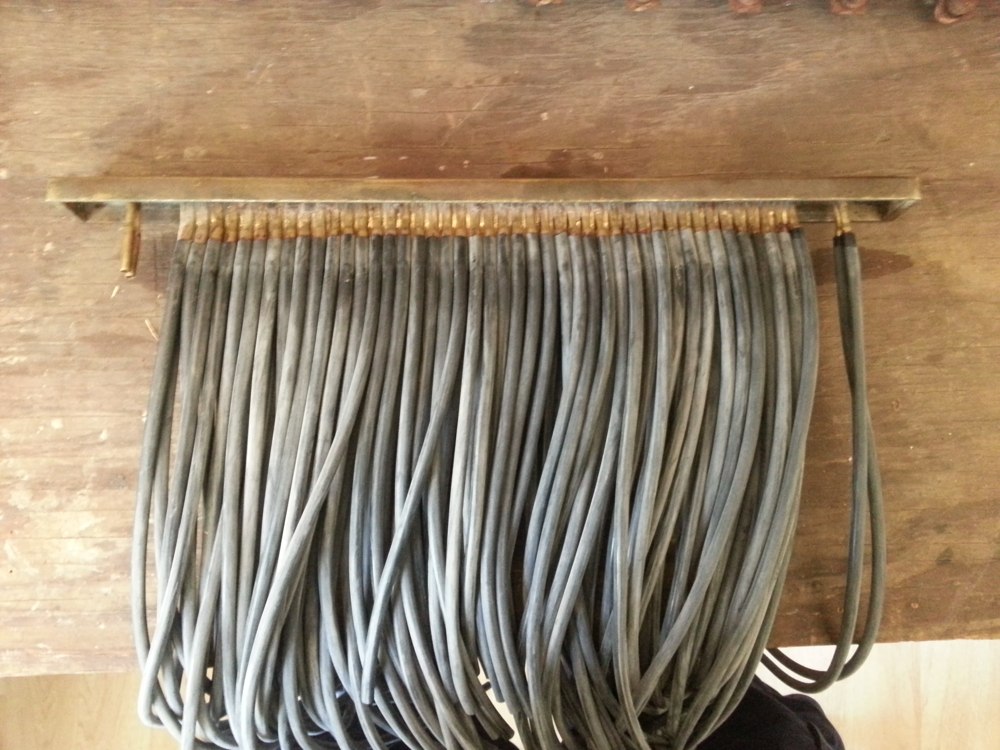
One of the more delicate parts of a player piano system is the series of small tubes connecting the tracker bar to the valves. The tracker bar is the brass bar in the top-center that “reads” the holes in the music rolls.

The tracker bar
When the pedals of a player piano are pumped, a vacuum is created inside the body of the system (aka the “valve chest”). This is where the valves are located. The vacuum also continues up through all of the tubes and into the tracker bar. When a hole in the music roll passes over the tracker bar, air is pulled into the corresponding tube which directs it to the “pouch board”. The pouch then operates the corresponding valve (which plays a specific note on the piano). In most old player pianos, these tubes are made of lead. Yes, that heavy, toxic metal that you hear so many bad things about. While lead is not harmful as long as it isn't disturbed, it can oxidize over time. This causes problems in player pianos because as the inside of the lead tubing oxidizes, it creates small, dusty particles that get pulled into the valve chest and can interfere with the action of the valves. This lead oxide can also be harmful if it is inhaled. Be sure to wear a lead-approved respirator as well as gloves while handling lead tubing. It is impossible to tell from the outside if the lead is oxidizing or not, because the outside of the lead tubing will be coated with shellac in most pianos, preventing its oxidation. The only way to tell if there is a problem is to cut open one of the tubes and look inside. If there is no powdery substance inside, simply splice the tube back together with a small piece of rubber tubing. If there is oxidation inside, the tubing should all be replaced.
For more information about the danger of lead tubing, take a look here: http://www.player-care.com/lead_tubing.html.
Before starting, order your new rubber tubing. You can get it here: http://www.player-care.com/tubing.html. Standard tracker bar tubing is 9/64” Inside Diameter. You will need at least 100 feet to re-tube an entire tracker bar. While you are at it, order 100 straight brass connectors for 9/64” ID tubing as well. You will need these later.
You will need to remove the upper stack (this is the assembly that sits on top of the keyboard and is comprised of the valve chest, striker pneumatics, and spoolbox). On Standard-type player actions, this is held in place by one large vertical screw on the right side and four medium-sized horizontal screws on the left. After removing these, the player action can be slid toward the front of the piano and lifted out. Rotate it 180 degrees and set it on a sturdy workbench. Before cutting anything, make note of any tubing that connects to any other devices. There will usually be a few tubes connecting to the tracker pneumatic on the left side (if viewed from the front). Make a drawing of where these tubes connect on each end, as they need to be re-tubed in the same order.
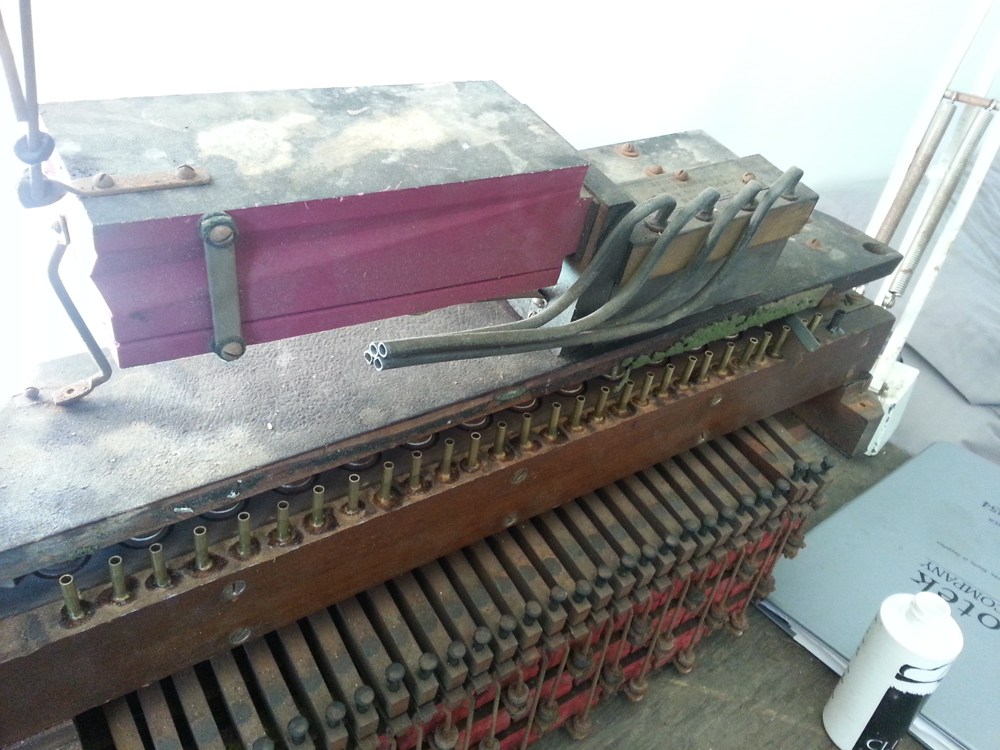
The tracking pneumatic. Before cutting the lead tubing, be sure to make a diagram of all tubes and where they connect on each end.
Using a shears, cut through the center of all of the lead tubing. The tubing is probably cemented directly into the pouch board. You will need to remove the tubing from the board. This is usually easy to do after the cement around the tube has been chipped away. Just gently grab the tube with a pliers and twist it back and forth until it comes free. If the tube breaks off, turn a screw into the center of the tube and use that to pull out the stump. To remove the tubing from the tracker bar, separate the tracker bar from the spoolbox by removing the two machine screws from each side. Soak the tracker bar in kerosene for a day or two until the tubing has softened enough to be scraped off. Give the tracker bar a good polishing with 0000 steel wool while you have it out.

The removed tracker bar ready for cleaning.
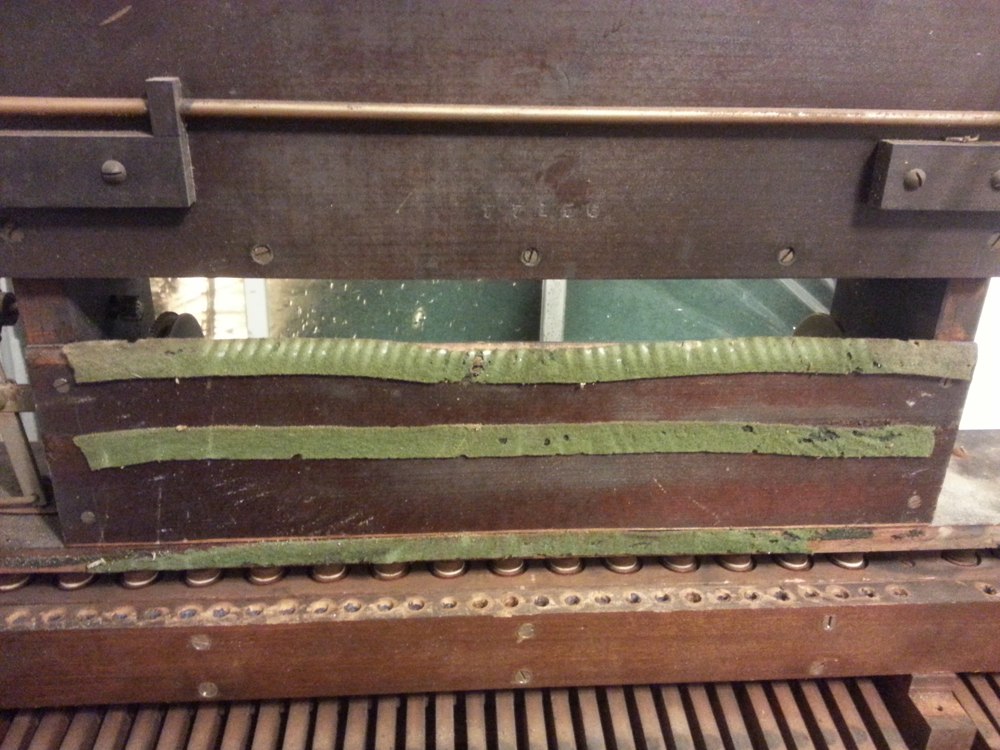
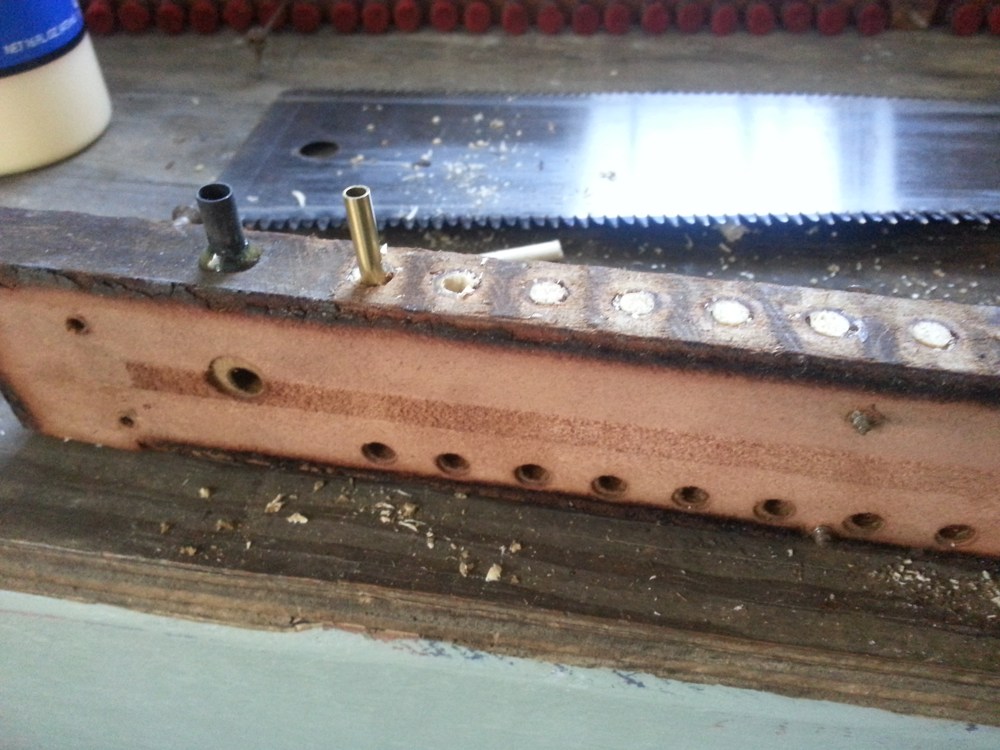
The backside of the spoolbox after removing the tracker bar. Notice the holes in the pouch board at the bottom of the photo where the lead tubing has been removed from.
While the tracker bar is soaking, the holes in the pouch board need to be modified. The new tubing cant be cemented directly into the board like the old tubing. Instead, the straight brass connectors that you bought are going to be glued into the board with burnt shellac. Burnt shellac can be made by buying a can of clear shellac from any hardware store, pouring about a cup into an old steel pot and igniting it. The alcohol will slowly burn off and the shellac will become thicker. Put out the flame by putting a lid on the pot after about 5 minutes. Let the shellac cool and then test the consistency. It should be about as thick as Elmer's Glue. If it is not thick enough, burn off some more alcohol. If it is too thick, add a bit of denatured alcohol. Burnt shellac will create an airtight seal, will stick to just about anything, and can be easily removed with alcohol. It also takes a very long time to set (sometimes up to a week).

New brass connectors.

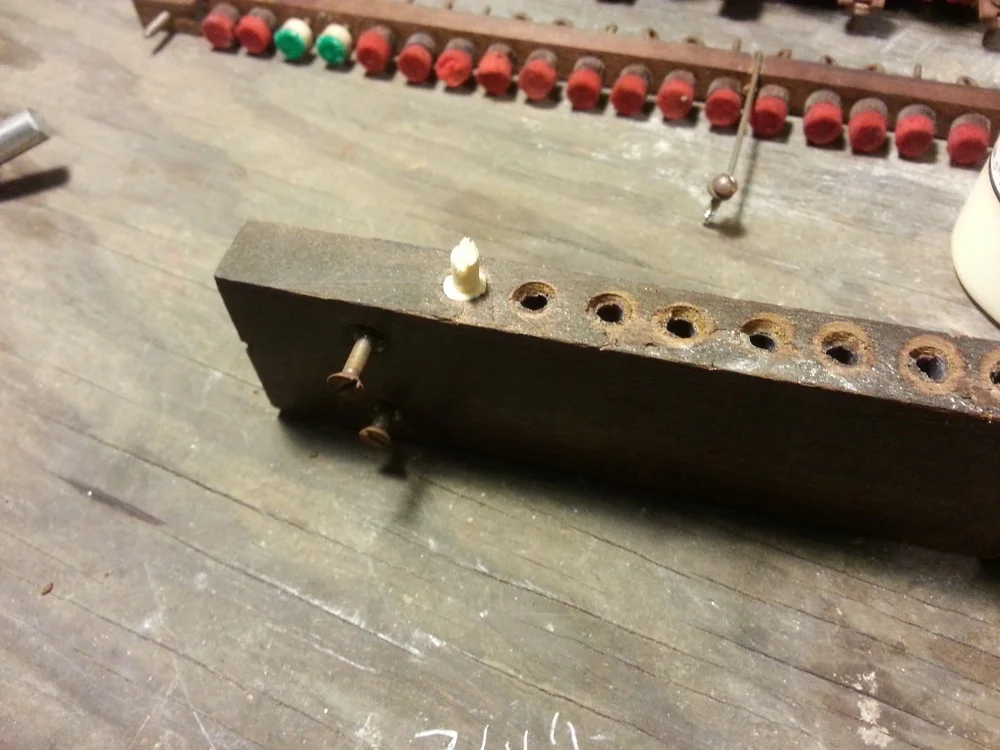
The pouch board removed from the upper stack.
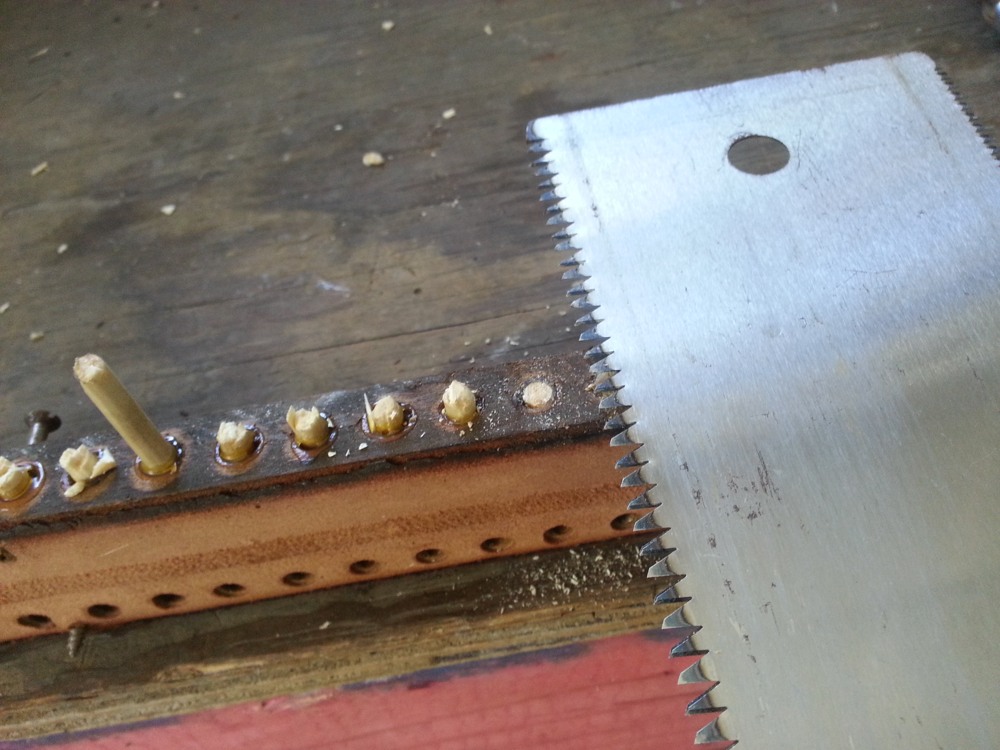
The brass connecters are slightly smaller diameter than the lead tubing that was glued into the pouch board, so the holes need to be plugged and re-drilled with the correct size drill bit. To plug the holes, first separate the pouch board from the upper stack by removing all of the screws going through the face of it, then clean any remaining bits of glue or tubing from the holes where the tubing was inserted. Keep track of which screw was where by finger tightening each screw into its correct hole in the upper stack after the board has been removed. Next, cut 88 1-inch-long pieces of wood dowel that will fit snugly into the holes. The proper size for me was 3/16”. Normally when plugging holes, I use plugs that have the grain running horizontally across the plug so that screws wont slice through them. In this case, we are just gluing brass tubes into the holes, so the orientation of the grain doesn't matter, and we can use dowels which have the grain running the length of the dowel. Use any wood glue to glue the dowel pieces into each of the pouch board holes. Push the dowel in about halfway. Once the glue for all of the dowels has set, use a fine toothed saw to cut them flush with the top of the board.

Wood dowels.

Dowel glued into the pouch board.
Dowel cut off.

Waiting for glue to dry.
Flush cutting the dowels.

Pouch board after plugging holes.
Use a 5/32” brad point drill bit to drill a hole through the center of each dowel. Drill as vertically as possible. Dump out any wood scraps in the hole, and gently blow each one out with compressed air. Using a small brush, paint a bit of burnt shellac onto the side of a brass connector. Twist the connector while pushing it into the board so that the shellac makes a collar around the connector. Push the connector about halfway into the board. Repeat this with the rest of the holes. At this point you can set this board aside for at least a few days while the shellac hardens.
Plug after drilling and inserting a brass connector.

Applying a drop of burnt shellac to the side of the brass connector.

Spin the connector into the pouch board to create a collar of burnt shellac.

Set the board aside for a week to allow the shellac to dry.
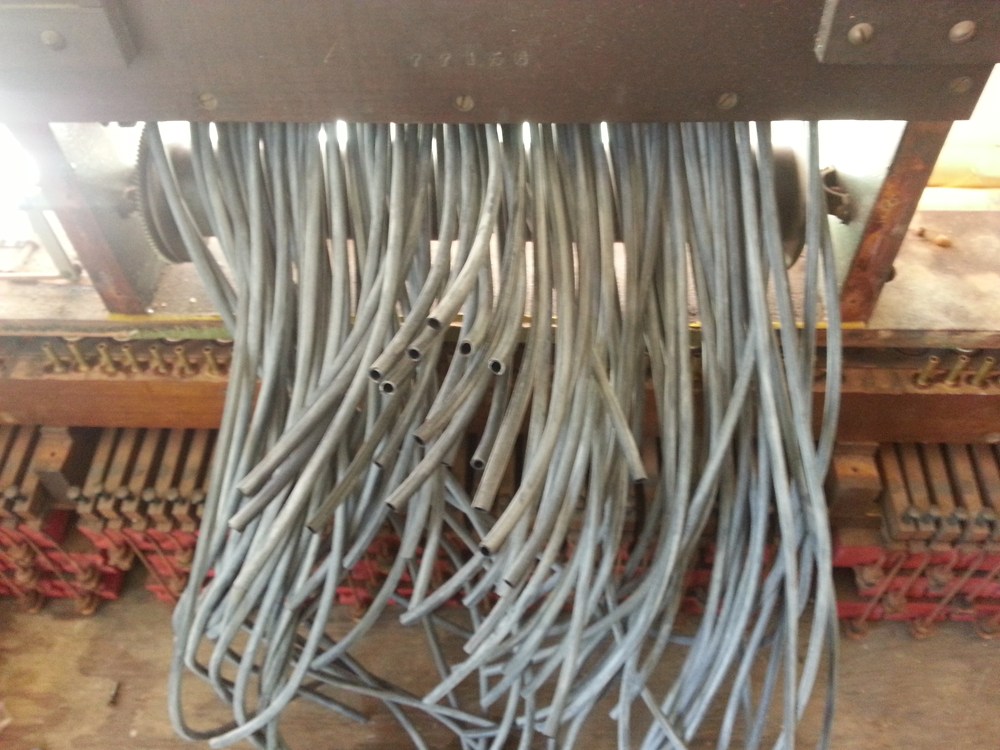
When the shellac is hard, re-attach the pouch board to the player action. The next step is to rough cut all of the rubber tubing to go from the tracker bar to the pouch board. Remove the tracker bar from the spoolbox by loosening the four machine screws from either side. The length of tubing can be estimated by holding one end in the approximate location inside the spoolbox and loosely running the other end to the correct brass connector. Be sure to leave some extra slack just in case. Cut the tubing, dip one end in a lubricant, and slide it onto the proper brass nipple on the back of the tracker bar. Make your way through all of the tracker bar nipples, making sure not to loose track of which connector you are measuring to. Cut the four pieces of tubing for the tracking pneumatic as well, following the drawing you made earlier. Attach these to the tracker bar.

Estimating the length of a piece of tubing.
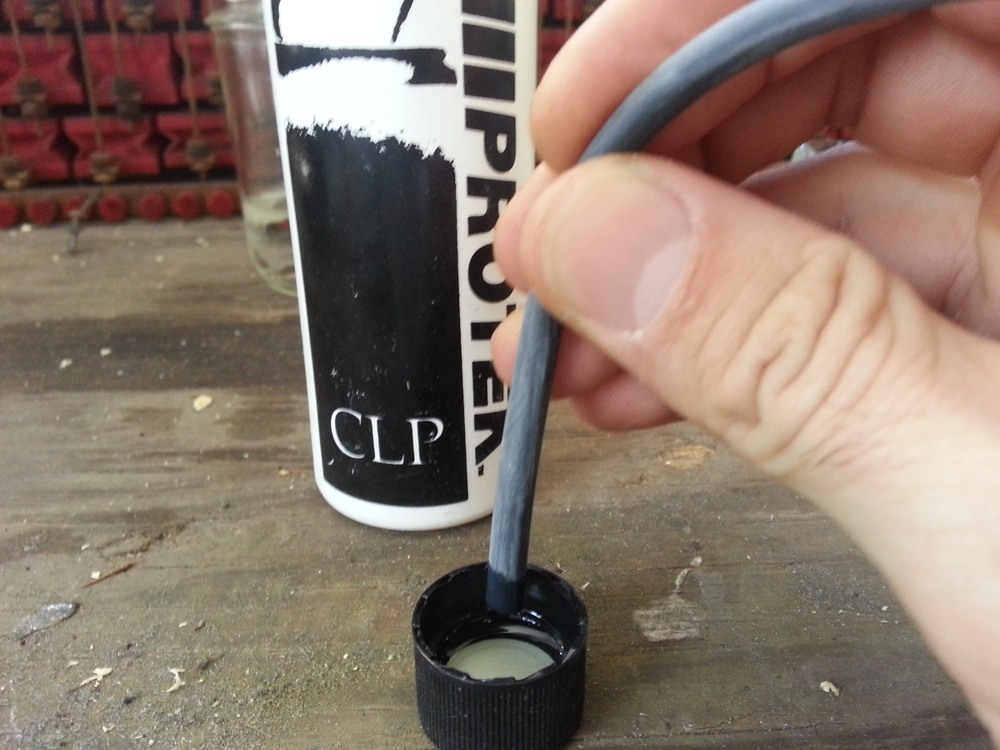
Lubricating one end of the tubing.
Pushing the tubing onto the tracker bar nipple.

Using a razor blade to keep track of which brass connector I am measuring to.
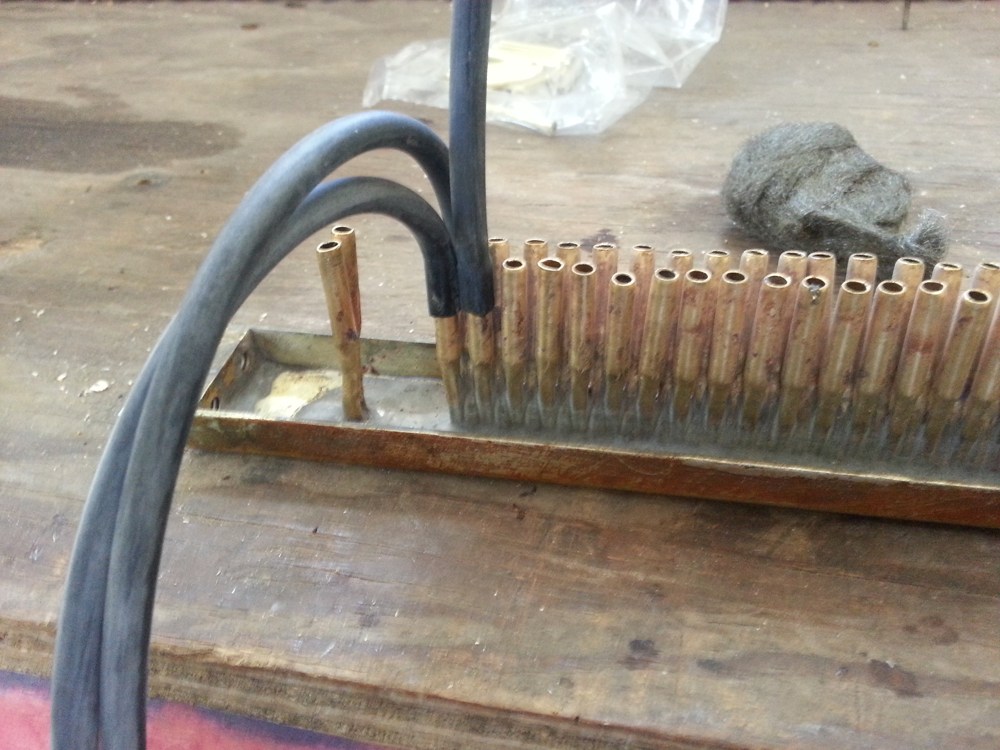
The tracker bar halfway tubed.
Tracker bar fully tubed (except for the two on the left which will lead to the tracking pneumatic).
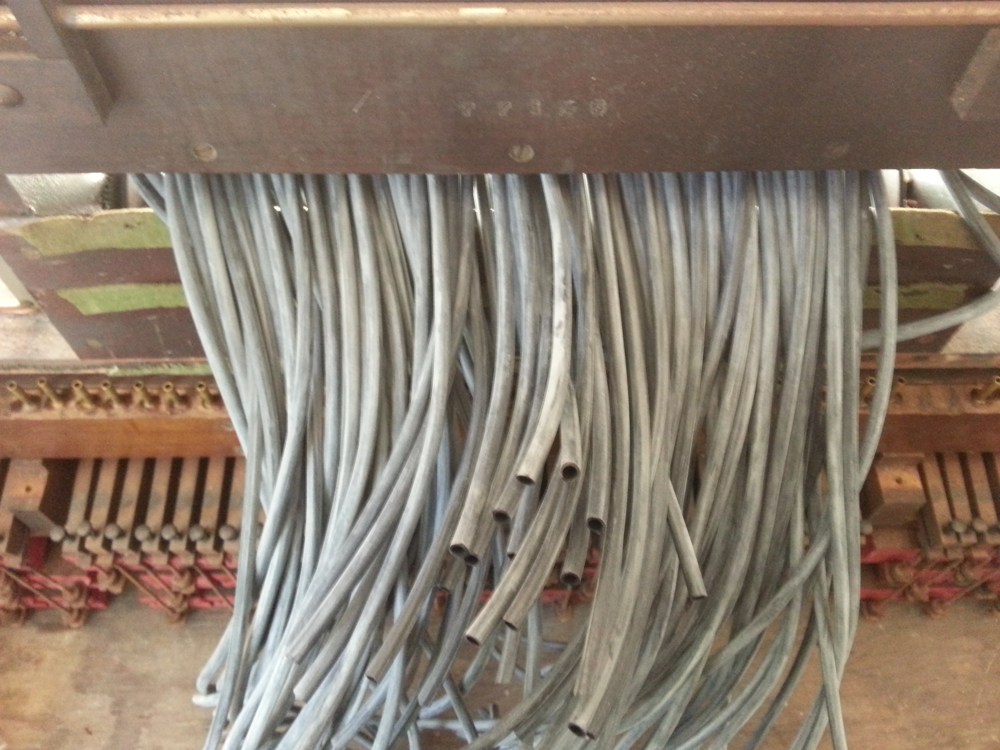
The tracker bar can now be reattached to the spoolbox. You may need to remove the thin panel in the back of the spoolbox to be able to insert the tracker bar from the back. Reinstall the panel after the tracker bar is reattached. Start sliding the free ends of the tubing over the brass connectors. Take your time and make sure that each tube is connected in the correct place. Use a flashlight and look at the back side of the tracker bar to be sure you have the next tube in line. If you have too much slack in a tube, cut it down a bit so that all of the tubes look clean and organized.

Pouch board re-attached.

Spoolbox back-board removed for easier installation of tracker bar.
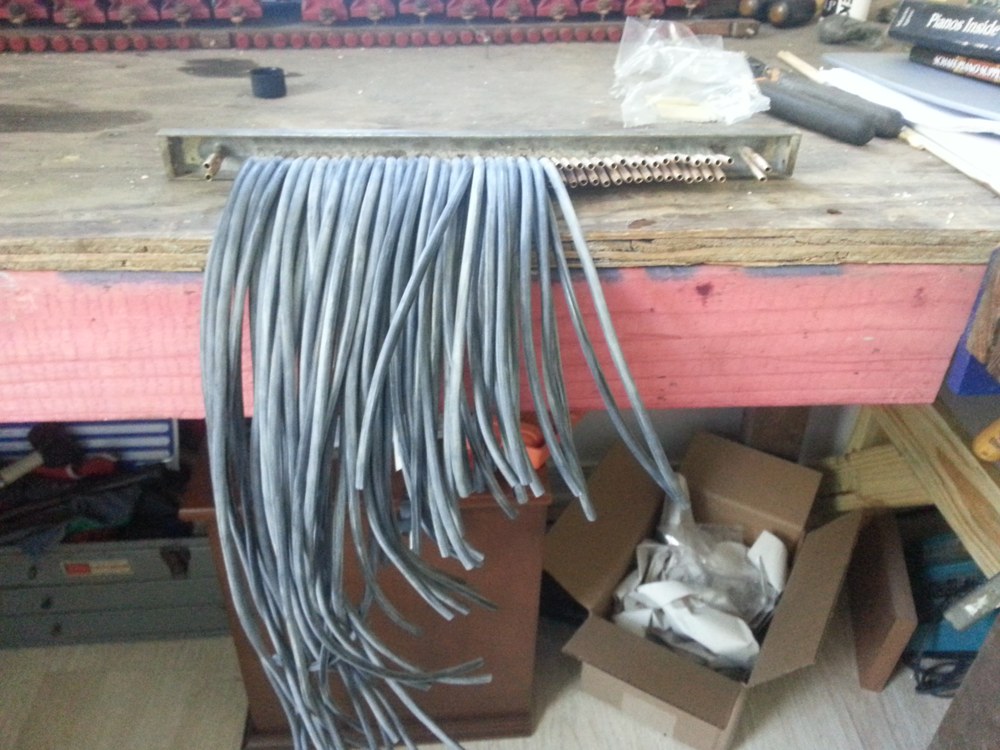
Tracker bar tubing coming out of the back of the spoolbox.
Spoolbox back-board reattached.

Attaching the tracker bar tubing to the brass connectors. Make sure the correct tube is being connected.
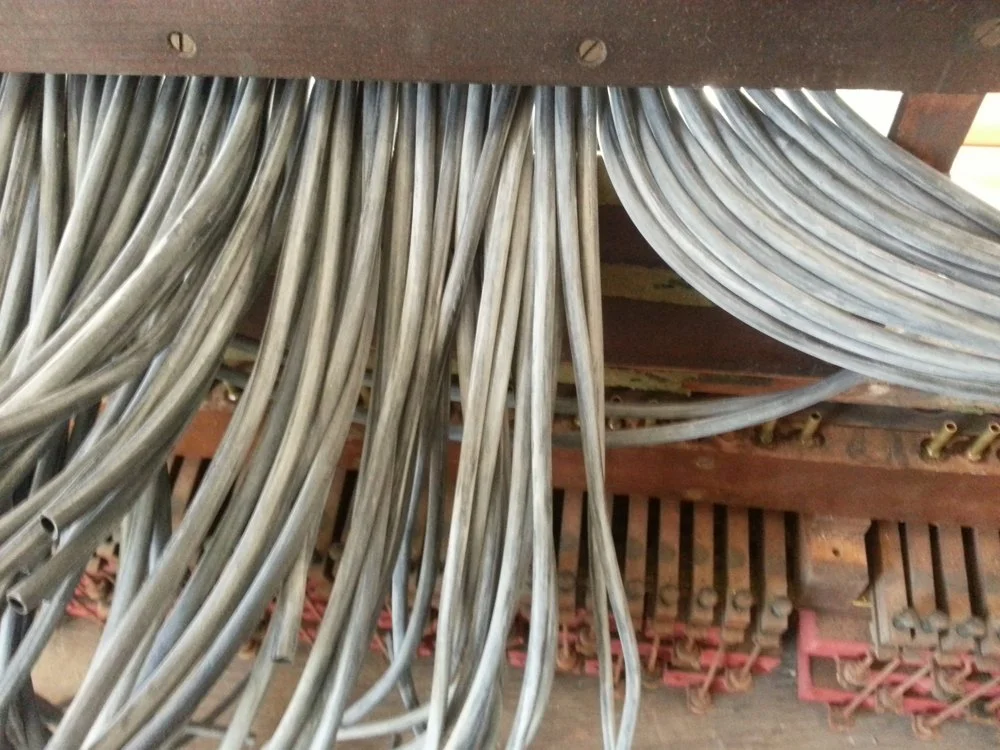
Keeping the tracker bar tidy after it has been attached to the brass connectors.

After all of the tubing has been attached to its brass connector, reinstall the player action and give it a test.
Recent Blog Posts


I have been servicing and tuning pianos in NOLA since 2012 after first becoming interested in piano technology in 2009. With a background in teaching bicycle mechanics, I bring a methodical mindset and a love of sharing knowledge and skills to the rich musical culture of New Orleans.