

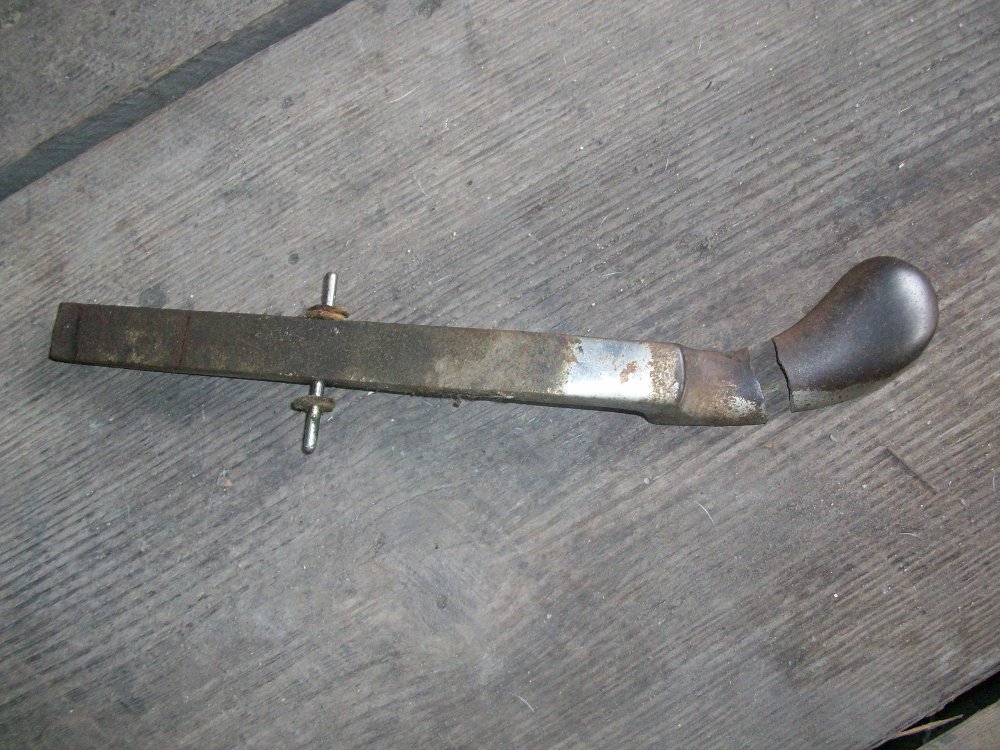
The damper pedal on my Kimball upright snapped in half the other day. This is not a particularly common problem to have, and the repair involved some metalworking (which is a field that I suspect most piano technicians don't have much experience in), so it seemed a great candidate for my first blog post.

The repair process involves removing the broken pedal from the piano, cleaning both pieces, brazing them back together, sanding the repair smooth, and reinstalling. Normally to remove a pedal on this piano, the entire piano must be tipped onto its back to remove the screws that hold the toe board on. The toe board is the horizontal piece of wood that has square holes for the pedals to extend through. In this case, the front half of the pedal was broken off and so the back half could be slid back through the toe board and removed from inside of the cabinet.

There are four screws that had to be loosened before the pedal could be removed. The pedal operates by pivoting on a steel pin that is held on either side by a block of wood. Also, note the steel wire that acts as a spring to return the pedal to its resting position when downward pressure is released. Once the four screws are loose, the wood blocks can be pulled away from the pedal, and the pedal can be pulled out toward the top of the picture.
Here you can see the pin that keeps the pedal from being pulled out of the front of the piano while the toe board is still in place. The pin can now be popped out with a hammer and punch. Removing it will allow me to later reinstall the pedal through the front of the toe board, and then tap the pin into place through the wood blocks and back through the pedal itself. While I have the pedal removed, I will also replace the felt bushings on the pin that reduce friction and provide quieter operation.

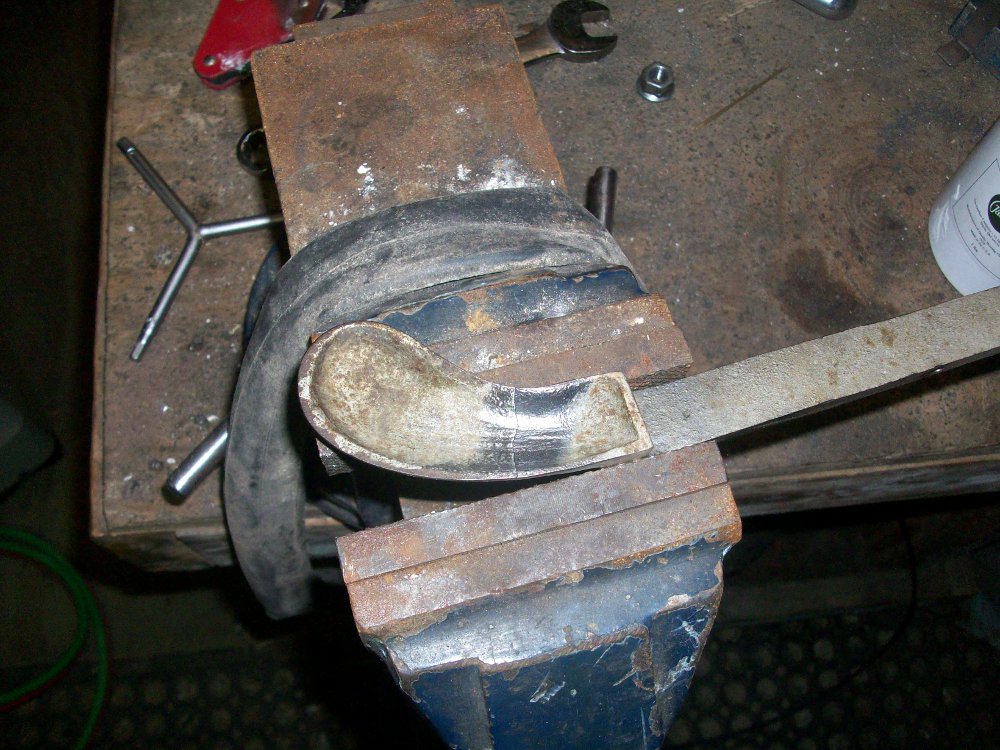
A clean joint is imperative for creating a strong bond while brazing. I use multiple grits of emery cloth for cleaning up these joints. Here you can see the clean joint that is ready to be fluxed and brazed.
I've recently acquired a new brazing system. I still have my old setup with standard oxygen and acetylene tanks and Smith torch and regulators which I will use for heavier duty brazing and cutting. The new setup is much lighter duty and consists of a BBQ propane tank, a medical oxygen concentrator, and a lightweight Smith torch. The main advantage to this system is convenience. I only have to go 5 blocks to the nearest Walgreens to refill the propane, rather than 12 miles to refill my acetylene and oxygen.

My old brazing setup.

My new brazing setup for light-duty work.
With my joining surfaces cleaned up, I brushed on my "Stainless Light" Silver Brazing Flux from Cycle Design USA and proceeded to fire up my oxy-propane torch. I brazed the pedal back together with 56% silver (also from Cycle Design USA) which worked fairly well.
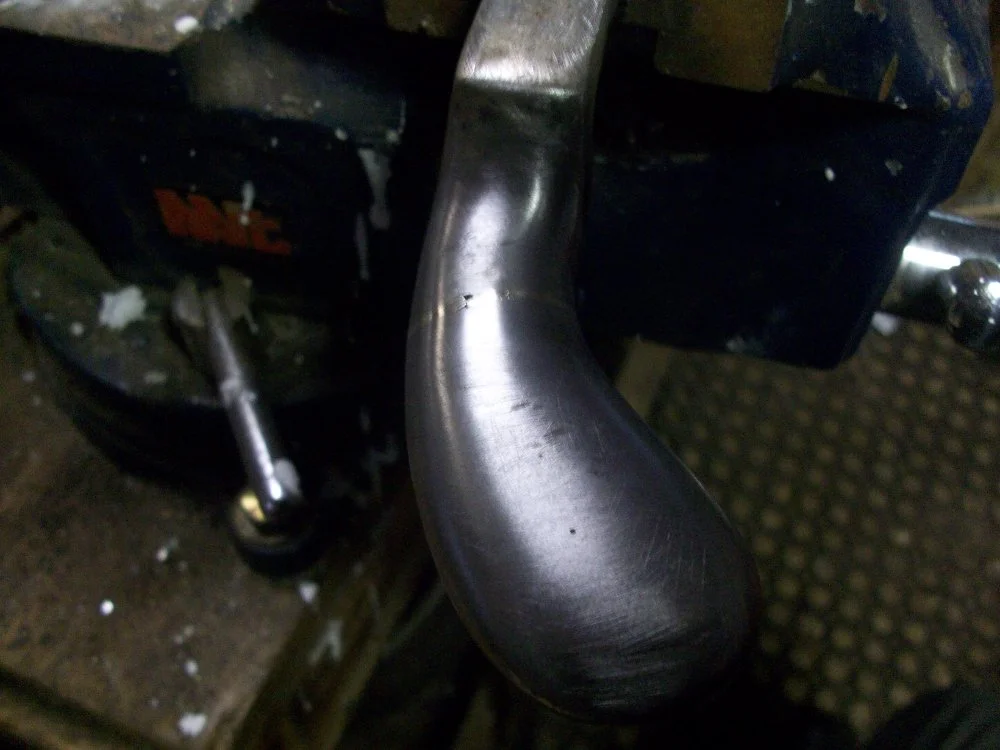
I did end up with a small spot that didn't fill in. I think the pedal was just a little too thick for this torch to be really effective. The oxygen concentrator can only put out about 8-9 psi, and I'm still figuring out the right pressure ratios. It seems the propane needs to be at much higher psi than acetylene does for brazing. On the bright side, the joint survived my testing, which consisted of holding the pedal on the square end and banging the round end against the table.
Flux applied to pedal.

Pedal after brazing and before cleanup.
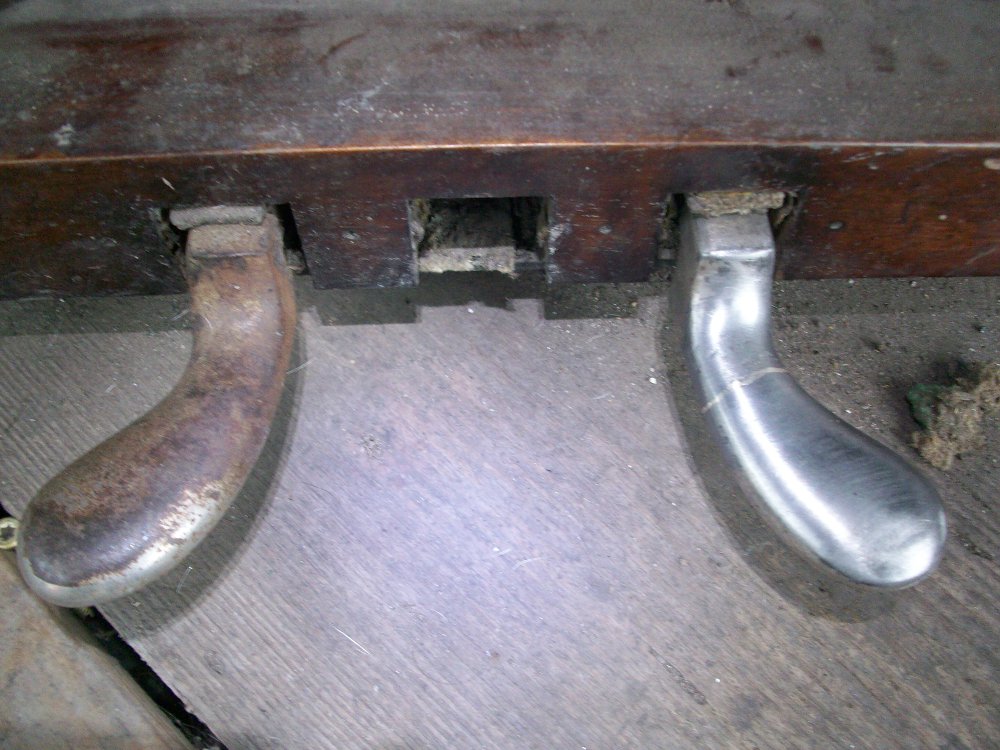
With the brazing done, I filed down the excess filler and sanded it smooth with emery cloth. I then reinserted the pedal through the toe board and tapped the steel pin back into place with the new felt bushings. I could have applied some kind of clearcoat to the pedal to keep it from rusting, but with the amount of friction this pedal will see against peoples' feet, I think I will just give it a rubbing of mineral oil every once in a while.
Pedal post-cleanup.
Recent Blog Posts


I have been servicing and tuning pianos in NOLA since 2012 after first becoming interested in piano technology in 2009. With a background in teaching bicycle mechanics, I bring a methodical mindset and a love of sharing knowledge and skills to the rich musical culture of New Orleans.